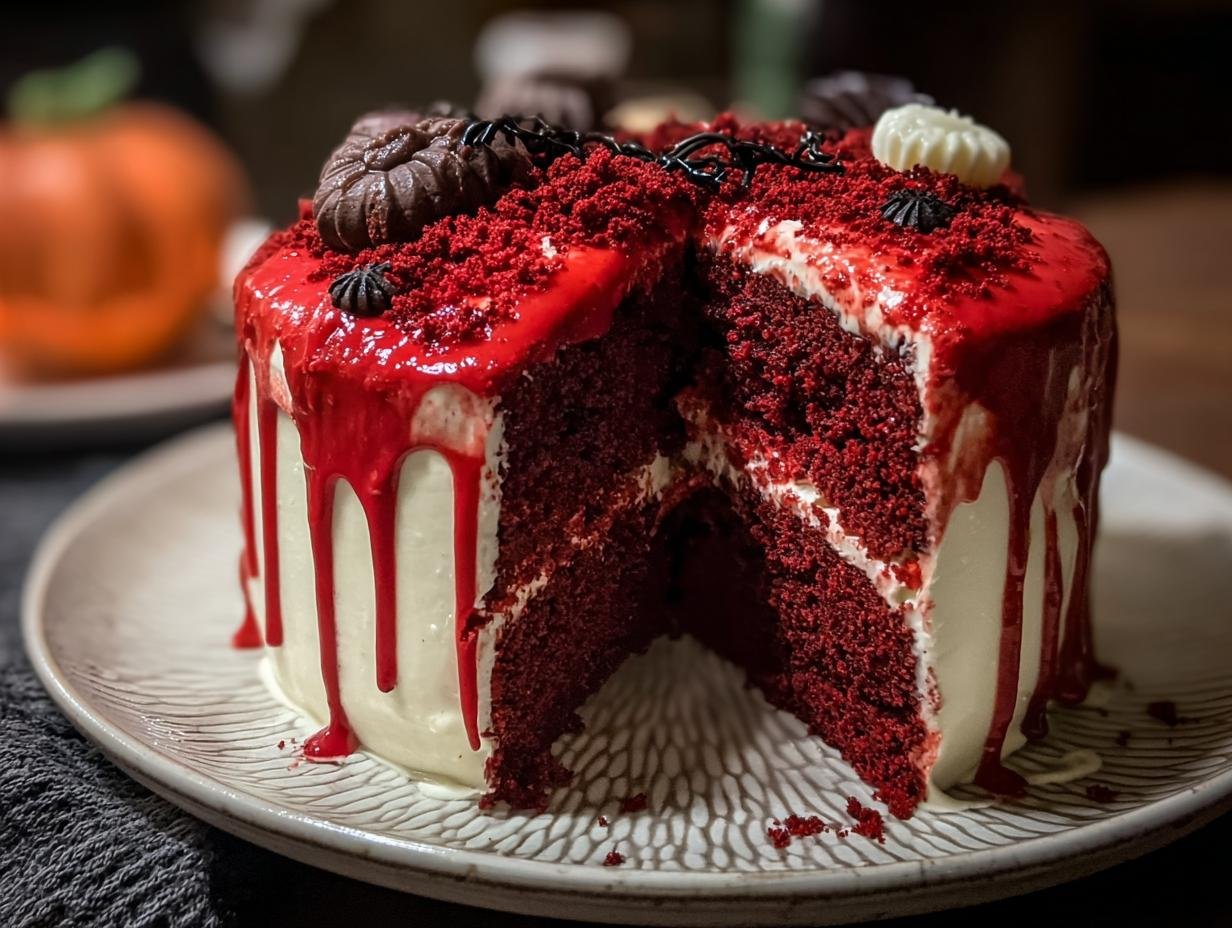
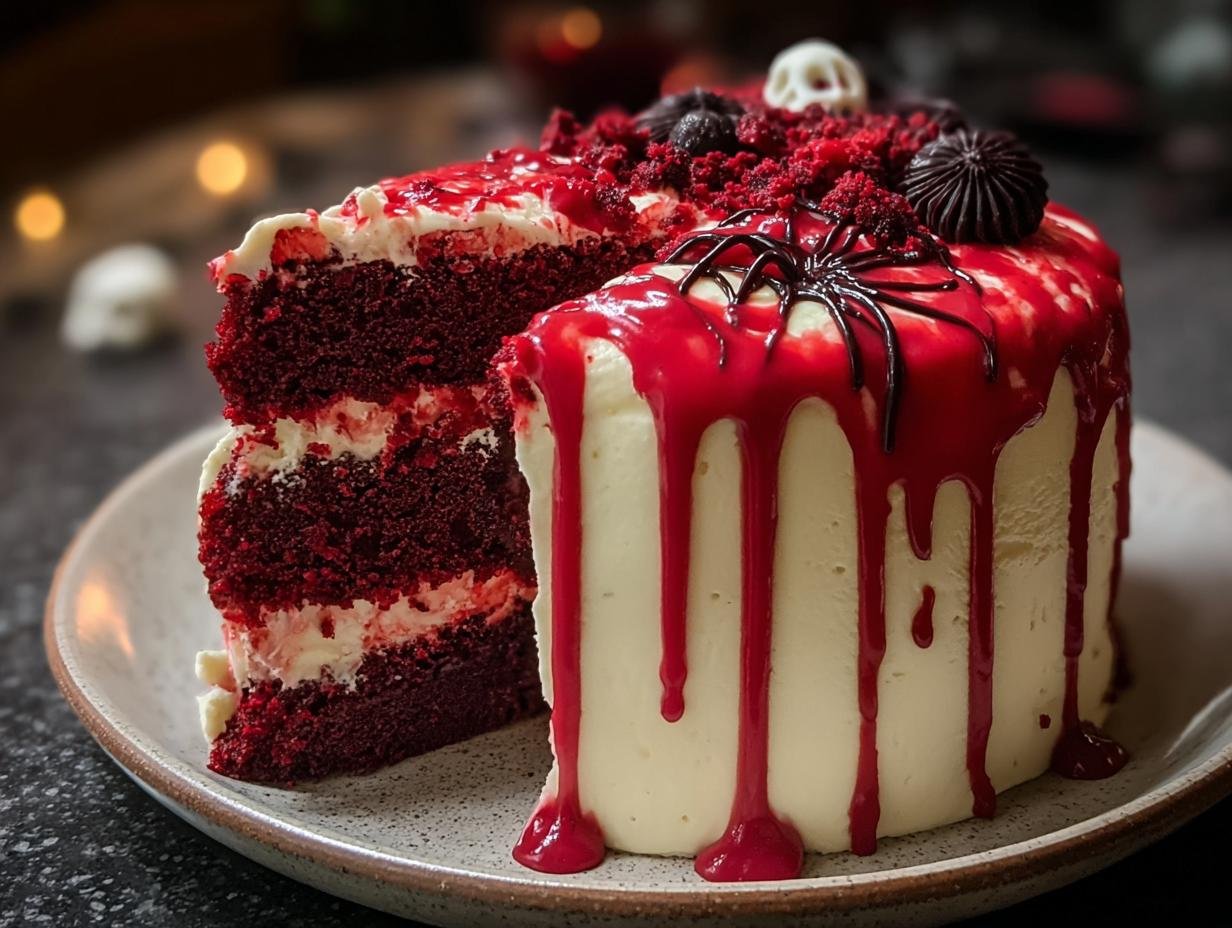
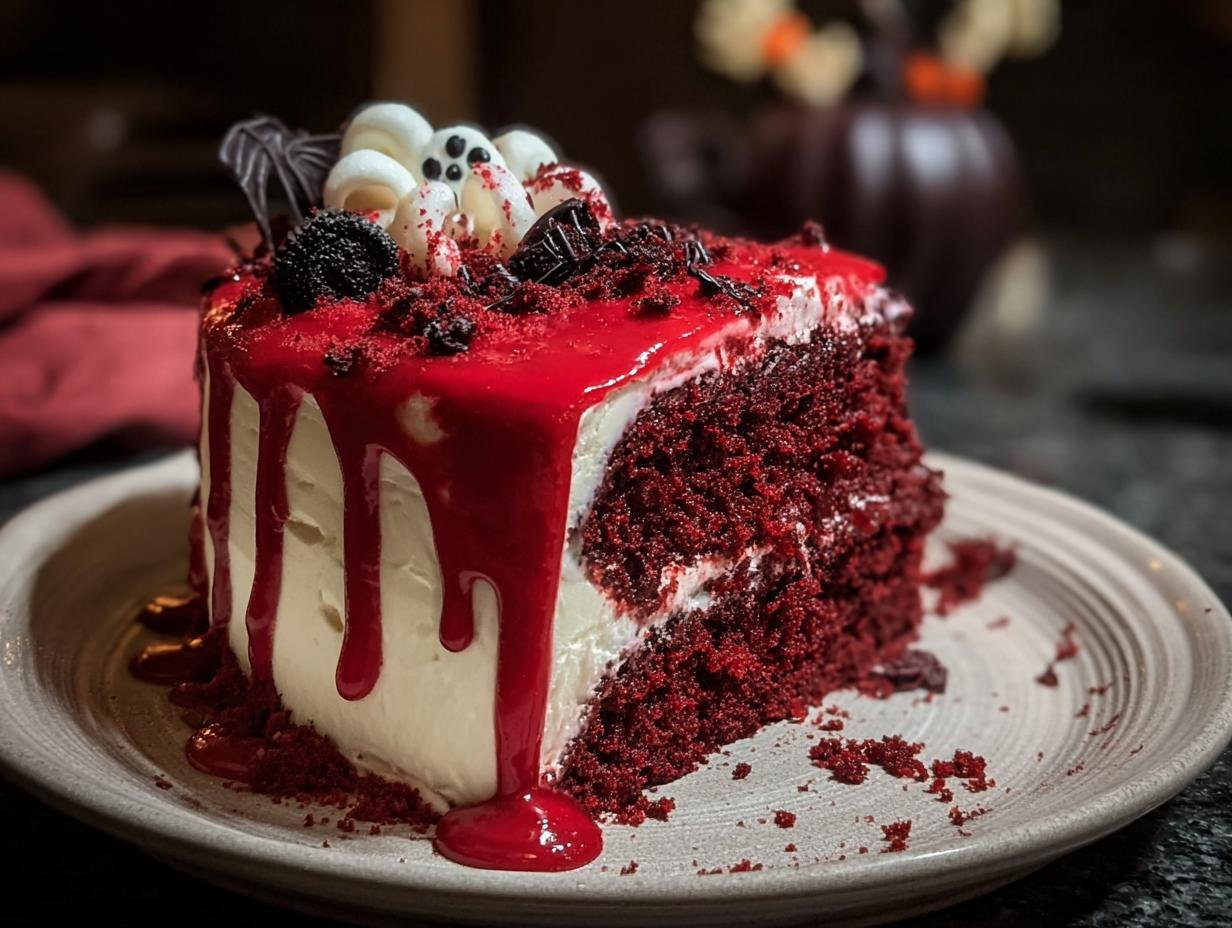
Halloween Red Velvet Cake has always been my go-to for a show-stopping dessert that screams spooky season! I remember the first time I tried making one; the deep, blood-red color and the rich chocolatey scent filling my kitchen felt like pure magic. It’s such a dramatic and delicious treat, perfect for any Halloween gathering. This recipe is surprisingly simple, making it an ideal choice for an easy Halloween red velvet cake that will impress all your guests. Let’s get baking this spooky season!
Why You’ll Love This Halloween Red Velvet Cake
This isn’t just any cake; it’s a Halloween showstopper that’s as delicious as it is spooky! Here’s why you’ll want to make it:
- It boasts an incredibly moist texture, thanks to the buttermilk and vinegar combination.
- You’ll adore the deep, rich chocolate flavor that’s subtle yet satisfying.
- The tangy cream cheese frosting is the perfect creamy counterpoint to the cake’s richness.
- That dramatic red drip effect is surprisingly easy to achieve and looks stunning.
- It’s absolutely perfect for any Halloween party or gathering you’re hosting.
- This recipe is wonderfully budget-friendly, making it an accessible treat.
- You’ll achieve that sought-after moist red velvet cake Halloween result every time.
- Making a truly moist red velvet cake Halloween has never been easier or more rewarding.
Ingredients for Halloween Red Velvet Cake
Gathering the right ingredients is key to this fantastic red velvet cake recipe. You’ll need:
- 1 cup unsalted butter, softened – for a tender crumb
- 1 ¾ cups granulated sugar – to sweeten and add moisture
- 2 large eggs – at room temperature for better incorporation
- 1 tsp vanilla extract – for that classic warm flavor
- 2 cups all-purpose flour – the base of our cake
- ⅓ cup Dutch-process cocoa powder – crucial for that deep color and rich chocolate flavor
- 1 tsp baking soda – our leavening agent
- 1 tsp salt – balances the sweetness
- 1 cup buttermilk – adds moisture and activates the baking soda
- 1 tbsp white vinegar – works with the buttermilk and baking soda for a tender crumb
- 2 tbsp red food coloring (gel preferred) – to achieve that signature blood-red hue
- 2 batches cream cheese frosting – the perfect tangy topping
- Optional: Red candy melts for “blood” drips, edible eyeballs, black sprinkles, Halloween cupcake toppers – for decorating
How to Make Halloween Red Velvet Cake
- Step 1: Preheat your oven to 350°F (175°C). Grease and line two 8-inch round cake pans with parchment paper. This ensures your beautiful cake doesn’t stick.
- Step 2: In a large bowl, cream together the softened butter and granulated sugar on medium-high speed. Beat until the mixture is light and fluffy, about 3–4 minutes. This aeration is key to a tender cake.
- Step 3: Add the large eggs one at a time, mixing well after each addition. Stir in the vanilla extract.
- Step 4: In a separate bowl, whisk together the all-purpose flour, Dutch-process cocoa powder, baking soda, and salt. This dry mix is the foundation of our delicious cake.
- Step 5: Add half of the dry ingredients to the wet ingredients and mix on low speed until just combined.
- Step 6: In a small bowl or measuring cup, combine the buttermilk, white vinegar, and red food coloring. Stir until the batter is smooth and a vivid red color. This is where the magic happens for our Halloween Red Velvet Cake!
- Step 7: Add the buttermilk mixture to the batter and mix until smooth. Then, add the remaining dry ingredients and combine until just mixed. Be careful not to overmix!
- Step 8: Divide the batter evenly between the prepared pans. I like to weigh them to ensure even layers.
- Step 9: Bake for 25–30 minutes, or until a wooden skewer inserted into the center comes out clean. The aroma will be incredible as you learn how to make Halloween red velvet cake.
- Step 10: Let the cakes cool in the pans for 15 minutes before carefully inverting them onto wire racks to cool completely. Patience here is key for easy decorating.
- Step 11: Once cooled, level the cake layers using a serrated knife for a flat surface. This step is crucial for a professional finish when you’re decorating your Halloween Red Velvet Cake.
- Step 12: Spread a generous amount of cream cheese frosting between the layers, then frost the top and sides of the cake.
- Step 13: For those signature blood drips, melt red candy melts or mix corn syrup with red gel food coloring. Drizzle carefully over the edges of the cake for a dramatic effect.
- Step 14: Decorate with optional edible eyeballs, black sprinkles, or Halloween cupcake toppers to complete your spooky creation.

Spooky Red Velvet Cake Ideas and Decorations
Let’s elevate your Halloween Red Velvet Cake from delicious to downright terrifying with these creative decorating tips! Achieving a truly decorated red velvet cake Halloween style is easier than you think. Consider these expert ideas for some frightfully fun spooky cake decorating ideas.
- Blood Drips: Melt red candy melts or mix corn syrup with red gel food coloring. Drizzle them over the edges of your frosted cake for a dramatic, bloody effect.
- Edible Eyeballs: Scatter edible candy eyeballs all over the cake for a creepy crawly look that will make your guests jump!
- Spiderwebs: Use white frosting or melted white chocolate in a piping bag with a fine tip to draw a spiderweb design on top of the red velvet cake.
- Mummy Cake: Frost the cake with white cream cheese frosting, then create mummy wrappings using thin strips of fondant or piped white frosting. Add two small dots of frosting for eyes.
- Ghostly Cake: Top your cake with piped meringue ghosts or use fondant cutouts for a charmingly spooky, ghostly appearance.
What’s the secret to perfect Halloween Red Velvet Cake?
The real secret to a perfect Halloween Red Velvet Cake is using gel food coloring for that intense, vibrant red. Also, chilling your cake layers before frosting makes them much easier to handle, leading to the best red velvet cake for Halloween results. For more baking tips, check out these typography insights.
Can I make Halloween Red Velvet Cake ahead of time?
Yes! You can bake and completely cool the cake layers up to two days in advance. Wrap them tightly in plastic wrap and store at room temperature. Decorate the day of serving for the freshest look. This is a great tip for busy hosts, similar to how one might prepare for a creamy sausage potato chowder.
How do I avoid common mistakes with Halloween Red Velvet Cake?
Avoid overmixing your batter, as this can lead to a tough cake. Ensure you use enough red food coloring – gel is best for a vivid hue. And don’t frost the cake while it’s still warm, as this can cause the frosting to melt and slide off. Learning about proper baking techniques can help avoid these issues, much like understanding lemon blueberry yogurt loaf recipes.
Best Ways to Serve Halloween Red Velvet Cake
Serving your spectacular Halloween Red Velvet Cake is the grand finale! For a classic pairing, a tall, cold glass of milk is always a hit, cutting through the richness of the cake and frosting. Another crowd-pleaser is a scoop of creamy vanilla ice cream, creating a delightful contrast in temperature and texture. This cake truly shines as a centerpiece for any Halloween dessert red velvet cake spread. You could also serve smaller slices alongside other spooky treats for a dessert buffet that guests will rave about! Consider pairing it with other festive desserts like caramel toffee crunch cake.
Nutrition Facts for Halloween Red Velvet Cake
Here’s a breakdown of the nutritional information for one slice of this delicious Halloween Red Velvet Cake:
- Calories: 480
- Fat: 25g
- Saturated Fat: 15g
- Unsaturated Fat: 8g
- Trans Fat: 0g
- Protein: 4g
- Carbohydrates: 58g
- Fiber: 2g
- Sugar: 38g
- Cholesterol: 90mg
- Sodium: 320mg
Nutritional values are estimates and may vary based on specific ingredients used for your Halloween red velvet cake recipe.

How to Store and Reheat Halloween Red Velvet Cake
Properly storing your stunning Halloween Red Velvet Cake is key to keeping it fresh and delicious for your guests. First, ensure the cake has cooled completely before attempting to store it. For short-term storage, place the frosted cake in an airtight container and keep it at room temperature for up to 2 days, especially if your home isn’t too warm. If you need longer Halloween cake storage, refrigerate it for 3-4 days. For even longer preservation, the undecorated cake layers can be wrapped tightly in plastic wrap, then foil, and frozen for up to 3 months. To reheat, simply bring the cake back to room temperature for about an hour before serving. This is a great way to preserve the freshness, much like how one might store Reese’s Peanut Butter Banana Bread.
Frequently Asked Questions About Halloween Red Velvet Cake
What makes red velvet cake red?
The signature red color in red velvet cake traditionally comes from a chemical reaction between buttermilk, vinegar, and a small amount of cocoa powder. However, this only gives a faint reddish-brown hue. To achieve the vibrant, iconic red for your Halloween Red Velvet Cake, most recipes today rely on red food coloring, preferably gel for a more intense color without affecting the batter’s consistency. Understanding the science behind baking can be fascinating, similar to learning about crema catalana.
Why is red velvet popular for Halloween?
Why is red velvet popular for Halloween? It’s all about the dramatic visual! The deep, blood-red color naturally lends itself to spooky themes. Paired with Halloween decorations like cobwebs, candy eyeballs, or a “bloody” drip effect, it transforms into the perfect festive dessert. It’s a visually striking cake that fits the eerie aesthetic of the holiday perfectly, making it a favorite for parties and trick-or-treat events. It’s a great example of how food can tie into seasonal celebrations, much like chocolate is for many holidays.
Can I use regular food coloring?
While you *can* use regular liquid food coloring, I highly recommend using gel food coloring for your Halloween Red Velvet Cake. Gel coloring is much more concentrated, meaning you’ll need less to achieve a vibrant red, and it won’t add extra liquid to your batter, which could affect the cake’s texture. You might need a lot of liquid food coloring, which can make the cake taste slightly off. For the best results, always opt for quality ingredients, like those found in a good vanilla paste recipe.
What frosting is best for red velvet?
The classic and most popular frosting for red velvet cake is a tangy cream cheese frosting. Its slight tanginess perfectly complements the rich, chocolatey flavor of the cake and cuts through the sweetness. It also provides a lovely white contrast that makes the red color pop, and it’s fantastic for decorating with spooky Halloween themes!
Variations of Halloween Red Velvet Cake You Can Try
Once you’ve mastered the classic, why not get creative with these fun variations of your Halloween Red Velvet Cake? You can easily adapt this recipe to suit different preferences and occasions.
- Red Velvet Cupcakes Halloween: Bake the batter in cupcake liners for individual treats. This is perfect for parties where guests can grab and go. You can still add the signature red drip and spooky decorations to each red velvet cupcake Halloween.
- Blood Red Velvet Cake Halloween Bundt: Pour the batter into a bundt pan for a stunning, sculpted cake. The shape itself is dramatic, and a drizzle of red glaze or melted candy melts can create a fantastic blood red velvet cake Halloween effect.
- Pumpkin Spice Red Velvet Cake Halloween: For a fall twist, add a teaspoon of pumpkin pie spice to your dry ingredients. This blends the warm flavors of autumn with the classic red velvet taste, creating a unique pumpkin spice red velvet cake Halloween.
- Dietary Adaptations: Want to make it gluten-free or vegan? You can often substitute gluten-free flour blends and use vegan butter, non-dairy milk, and flax eggs to create delicious vegan red velvet cake.

Scary Halloween Red Velvet Cake 1 Slice
- Total Time: 50 minutes
- Yield: 12 servings 1x
- Diet: Vegetarian
Description
A spooky Halloween Red Velvet Cake featuring a deep crimson hue, rich cocoa flavor, tangy cream cheese frosting, and dramatic red drip effects. This cake is perfect for Halloween parties and is surprisingly easy to make.
Ingredients
- 1 cup unsalted butter, softened
- 1 ¾ cups granulated sugar
- 2 large eggs
- 1 tsp vanilla extract
- 2 cups all-purpose flour
- ⅓ cup Dutch-process cocoa powder
- 1 tsp baking soda
- 1 tsp salt
- 1 cup buttermilk
- 1 tbsp white vinegar
- 2 tbsp red food coloring (gel preferred)
- 2 batches cream cheese frosting
- Optional: Red candy melts for “blood” drips, edible eyeballs, black sprinkles, Halloween cupcake toppers
Instructions
- Preheat your oven to 350°F. Grease and line two 8-inch round pans with parchment paper.
- Cream the softened butter and granulated sugar together on medium-high speed until the mixture is light and fluffy, about 3–4 minutes.
- Add the large eggs one at a time, mixing well after each addition. Stir in the vanilla extract.
- In a separate bowl, whisk together the all-purpose flour, Dutch-process cocoa powder, baking soda, and salt.
- Add half of the dry ingredients to the wet ingredients and mix.
- Pour in the buttermilk, white vinegar, and red food coloring. Stir until the batter is smooth and a vivid red color.
- Add the remaining dry ingredients to the batter and combine until just mixed.
- Divide the batter evenly between the prepared pans.
- Bake for 25–30 minutes, or until a wooden skewer inserted into the center comes out clean.
- Let the cakes cool in the pans for 15 minutes before inverting them onto wire racks to cool completely.
- Once cooled, level the cake layers using a serrated knife.
- Spread cream cheese frosting between the layers, then frost the top and sides of the cake.
- For blood drips, melt red candy melts or mix corn syrup with red gel food coloring. Drizzle over the edges of the cake.
- Decorate with optional edible eyeballs, black sprinkles, or Halloween cupcake toppers for a spooky Halloween red velvet cake presentation.
Notes
- Using gel food coloring provides the most intense red color without altering the cake’s texture.
- Chill the cake layers before frosting for cleaner lines and easier handling.
- Add sour cream to the batter for extra moisture if desired.
- Consider freezing cake layers for neater frosting and stacking.
- Get creative with decorations like skull molds, spiderweb patterns, or a bloody bundt cake variation.
- Prep Time: 20 minutes
- Cook Time: 30 minutes
- Category: Dessert
- Method: Baking
- Cuisine: American
Nutrition
- Serving Size: 1 slice
- Calories: 480
- Sugar: 38g
- Sodium: 320mg
- Fat: 25g
- Saturated Fat: 15g
- Unsaturated Fat: 8g
- Trans Fat: 0g
- Carbohydrates: 58g
- Fiber: 2g
- Protein: 4g
- Cholesterol: 90mg

