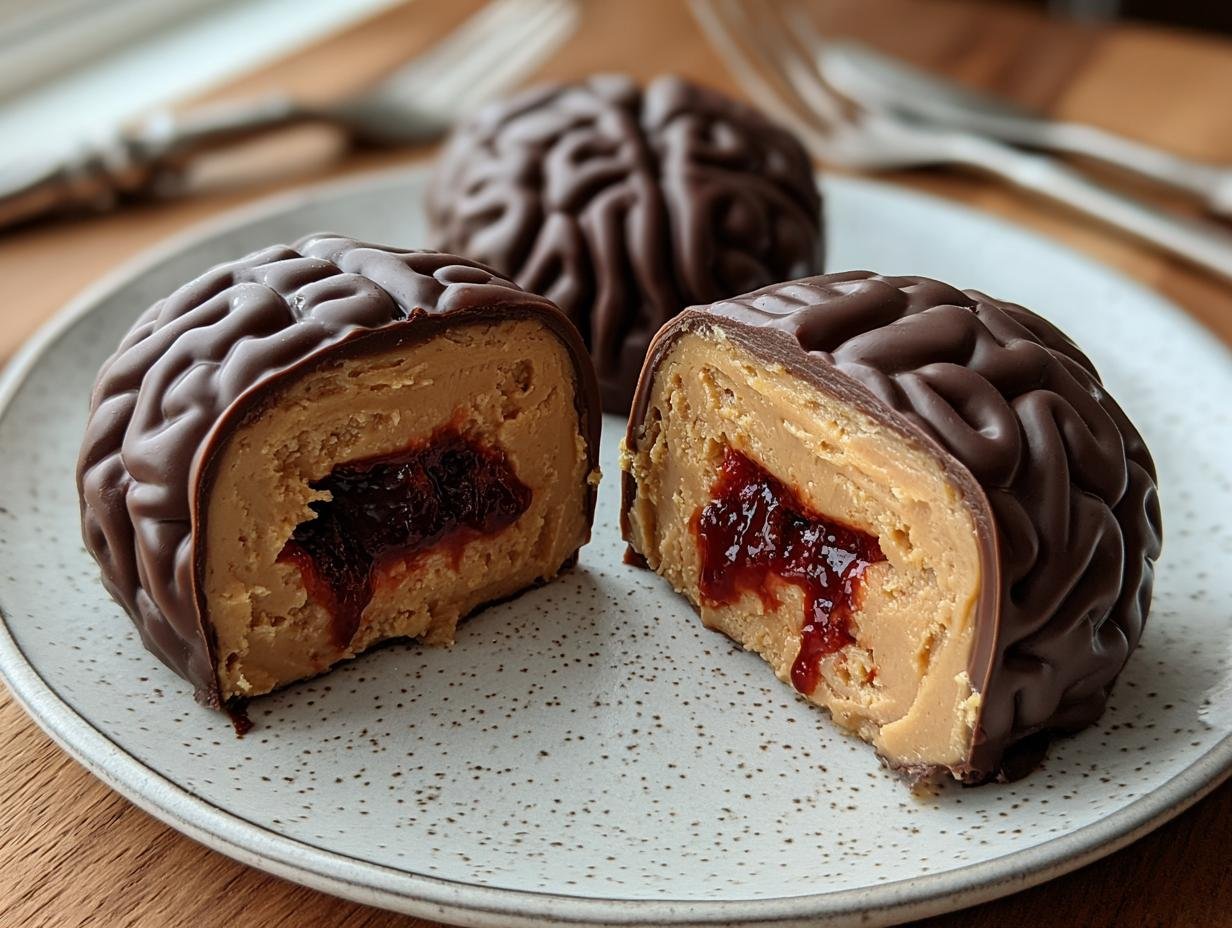
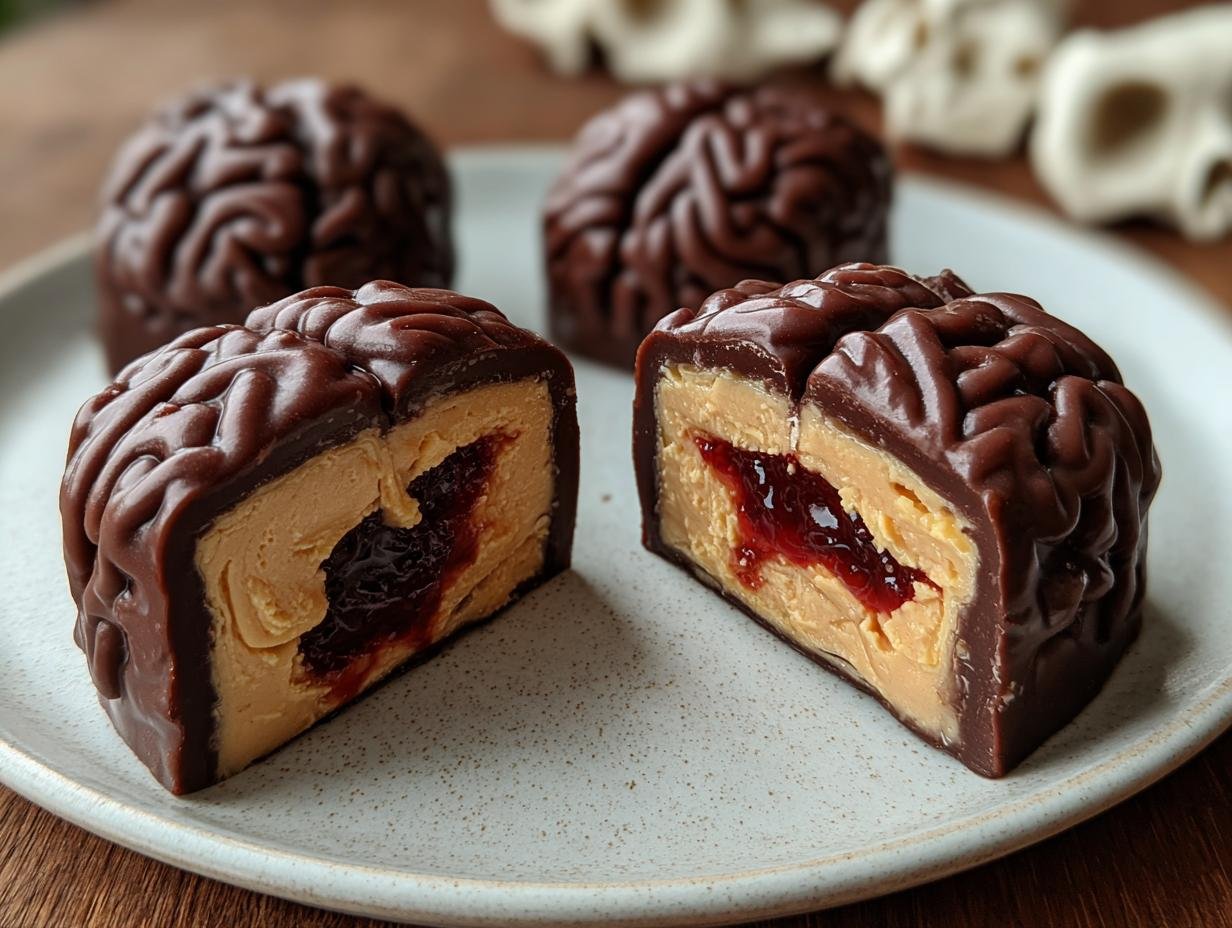
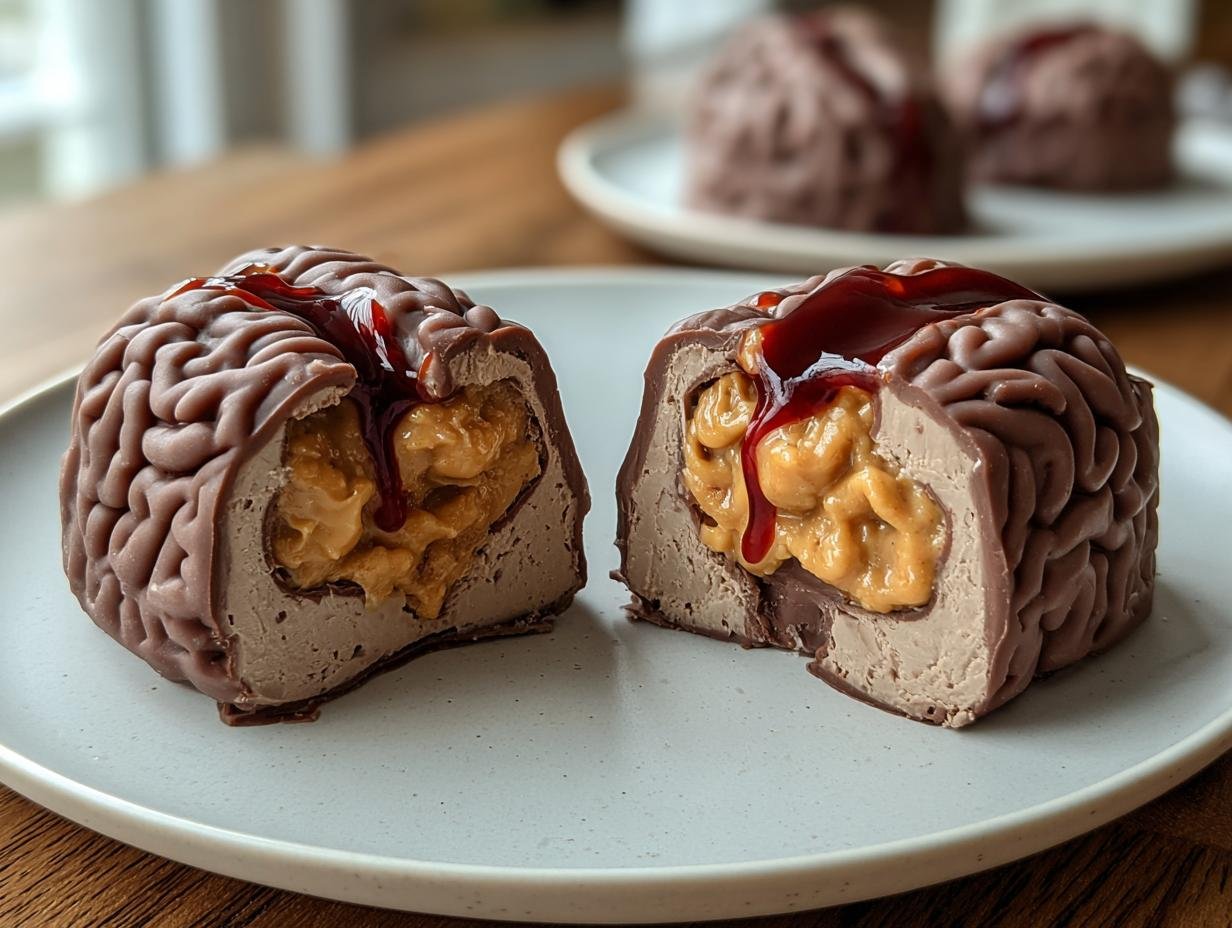
Fudge Halloween recipes are my absolute favorite way to get into the spooky spirit, and this one is a real showstopper! I’ve discovered the perfect balance between creepy and delicious with these brain-shaped chocolate peanut butter fudge treats, complete with a gooey raspberry “blood” center. They look incredibly intricate, but I promise you, they’re an incredibly easy Halloween fudge to whip up for any party. Get ready to impress your guests with this amazing Halloween candy fudge that’s both terrifying and tasty. Let’s get cooking!
Why You’ll Love This Fudge Halloween Recipe
You’re going to adore making and serving these spooky treats! Here’s why this recipe is a Halloween must-have:
- The classic chocolate and peanut butter combination is completely irresistible.
- It’s shockingly easy to prepare, making it perfect for busy hosts.
- These are the ultimate dessert for any Halloween party, guaranteed to be a hit.
- The impressive spooky appearance of the brain shape with “blood” is sure to wow your guests.
- You can easily customize the “blood” center with different jams or even red food coloring.
- It’s a fun and engaging way to involve kids in making homemade Halloween fudge.
- The no-bake method means less time in the kitchen and more time for spooky fun!
Ingredients for Spooky Fudge Halloween Brains
Gather these simple ingredients to create your creepy, delicious Halloween treats. The magic behind this Halloween peanut butter fudge lies in its rich chocolate and creamy peanut butter base, enhanced by the sweetness of condensed milk. It’s surprisingly straightforward to assemble!
- 1 (14-ounce) can sweetened condensed milk – this provides the creamy texture and sweetness essential for fudge.
- 3 cups semi-sweet chocolate chips – the backbone of our chocolate flavor.
- 1/2 cup creamy peanut butter – for that irresistible nutty depth that pairs perfectly with chocolate.
- 1/4 cup unsalted butter – adds richness and helps create a smooth texture.
- 1/4 teaspoon salt – balances the sweetness and enhances all the other flavors.
- 1 teaspoon vanilla extract – a classic flavor enhancer for chocolate and peanut butter.
- 1/3 cup seedless raspberry or strawberry jam – this creates our spooky “blood” center; seedless is key for a smooth look.
- Optional: red food coloring – for an extra gory and dramatic effect on your “blood.”
- Optional: brain-shaped silicone mold – or a mini muffin tin if you don’t have a special mold.

How to Make This Easy Fudge Halloween
Ready to dive into the fun? Learning how to make Halloween fudge this spooky and delicious is easier than you think! This no-bake Halloween fudge comes together quickly for a frightfully good treat.
- Step 1: First things first, get your spooky molds ready! Lightly grease your brain-shaped silicone mold or a mini muffin tin. Place the prepared mold onto a small tray or a piece of parchment paper that fits in your freezer. This makes it so much easier to move later.
- Step 2: In a medium saucepan, combine the 3 cups semi-sweet chocolate chips, 1/2 cup creamy peanut butter, 1 (14-ounce) can sweetened condensed milk, and 1/4 cup unsalted butter. Set your stovetop to low heat – we want to melt everything gently, not scorch it.
- Step 3: Stir the mixture constantly until it’s completely smooth and glossy. Keep that heat low and slow! Once all the chocolate and peanut butter goodness is melted and combined, remove the pan from the heat.
- Step 4: Stir in the 1/4 teaspoon salt and 1 teaspoon vanilla extract. These little additions really make the flavors pop.
- Step 5: Now for the creepy part! Spoon the warm fudge mixture into each mold cavity, filling it only about halfway. Gently press the fudge up the sides of the mold to create a little well for our “blood.”
- Step 6: Carefully spoon about 1 teaspoon of the 1/3 cup seedless raspberry jam into the center of each fudge-filled cavity. If you’re feeling extra ghoulish, add a tiny drop of red food coloring to the jam for a more dramatic, bloody effect.
- Step 7: Top each cavity with a bit more fudge mixture, making sure to completely cover the jam. Gently smooth the tops with a small spatula or the back of a spoon so they look nice and even.
- Step 8: Place the tray with the filled molds into your freezer. Let them chill and firm up for at least 2-3 hours, or until the fudge is solid to the touch.
- Step 9: Once firm, carefully unmold your creepy creations. Gently pop them out of the silicone or muffin tin. You can serve them chilled straight from the freezer for a firmer bite, or let them sit at room temperature for about 15-20 minutes to achieve that perfect gooey center.

Pro Tips for the Best Fudge Halloween Ideas
Want to make your spooky treats even more spectacular? I’ve got a few tricks up my sleeve to ensure your Halloween fudge is a chilling success!
- Always use good quality chocolate chips for the best flavor and texture.
- Work quickly once the fudge is made, as it starts to thicken as it cools, making it harder to mold.
- Lightly greasing your molds is crucial for easy release – don’t skip this step!
- For a truly gruesome look, let the fudge firm up slightly before adding the jam center.
What’s the secret to perfect spooky fudge Halloween?
The real secret is working quickly once the fudge is melted. This prevents it from becoming too thick to mold properly. Also, ensure your molds are lightly greased for a clean release every time. For more baking tips, check out these baking tips.
Can I make Fudge Halloween ahead of time?
Absolutely! This Halloween candy fudge is perfect for making ahead. Once firm, store the fudge in an airtight container in the freezer for up to 3 months. It’s a great party prep strategy.
How do I avoid common mistakes with Halloween fudge recipes?
Avoid overheating the chocolate mixture; stir constantly over low heat. Also, make sure you freeze the fudge long enough – at least 2-3 hours – until it’s completely firm for easy unmolding.
Best Ways to Serve Your Brain Fudge Halloween
Once your creepy creations are ready, it’s time to show them off! These spooky treats are perfect for a Halloween party buffet. Arrange them artfully on a dark platter, perhaps with some cobweb-like spun sugar or edible “dirt” pudding for extra atmosphere. They also make fantastic individual favors for your guests to take home – just wrap each brain fudge in a clear cellophane bag tied with a festive ribbon. For an extra touch of flair and to elevate your Halloween fudge decorations, consider adding a tiny edible googly eye or a drizzle of red gel icing before serving. If you’re looking for other fun dessert ideas, consider these chocolate dump cake recipes.
Nutrition Facts for Fudge Halloween
Here are the estimated nutritional values for each spooky brain fudge serving. Remember, these are approximations and can vary slightly based on your exact ingredients and how much jam you use for that gruesome “blood” effect! For more information on general nutrition, you can consult resources on healthy eating.
- Calories: 250
- Fat: 14g
- Saturated Fat: 8g
- Protein: 4g
- Carbohydrates: 28g
- Sugar: 24g
- Sodium: 60mg
Nutritional values are estimates and may vary based on specific ingredients used.
How to Store and Reheat Your Halloween Fudge
Keeping your spooky treats fresh is key, especially when planning for Halloween fudge for parties. After you’ve successfully made your creepy creations, let them cool completely at room temperature for about 20-30 minutes if you didn’t serve them chilled. Then, transfer them to an airtight container. For short-term storage, they’ll stay delicious in the refrigerator for about 3 to 4 days. If you need to store them longer, wrapping them well and popping them in the freezer is your best bet – they can last up to 3 months!
While this fudge is best served chilled or at room temperature to enjoy that gooey center, you generally don’t need to reheat it. If, for some reason, your fudge has become too firm after freezing, you can let it thaw in the refrigerator overnight, then bring it to room temperature for about 15-20 minutes before serving. This ensures you get that perfect, slightly melty texture that makes this Halloween candy fudge so irresistible. For other no-bake treats, check out these no-bake cookies.
Frequently Asked Questions About Halloween Fudge Recipes
Can I use different types of jam for this Halloween fudge?
Absolutely! While seedless raspberry jam gives that classic “blood” look, feel free to experiment with other seedless jams like strawberry, cherry, or even a tart cranberry for a different flavor profile. Just make sure it’s seedless for the smoothest, creepiest effect in your easy Halloween fudge.
What if I don’t have a brain mold for this Fudge Halloween?
No brain mold? No problem! A mini muffin tin works wonderfully. You can also use other fun Halloween-shaped silicone molds, or even just pour the fudge into a square pan, let it set, and then cut it into small squares and carve a little “gooey” center into them once slightly softened. Get creative with your Halloween candy fudge shapes!
How do I get the gooey center just right in my Halloween fudge?
The key to the perfect gooey center is the amount of jam you use and the chilling time. Don’t overfill the center with jam, about a teaspoon is usually perfect for a standard mold cavity. Ensure the fudge is frozen until firm (2-3 hours) and then allow it to sit at room temperature for about 15-20 minutes before serving. This allows the jam to become perfectly gooey without the fudge melting completely.
Can I make this Fudge Halloween recipe with kids?
Definitely! This recipe is fantastic for getting kids involved in the kitchen. They’ll love spooning the jam into the centers and helping to smooth the tops. Just supervise them closely during the melting process and when handling the warm fudge mixture. It’s a fun way to create memorable spooky treats together!
Creative Variations of Fudge Halloween Treats
Looking for more ways to make your Halloween treats uniquely spooky? This creative Halloween fudge recipe is super adaptable! You can truly let your imagination run wild with these fun ideas to make your fudge even more terrifyingly delicious.
- Candy Melt Makeover: Instead of just chocolate, try using different colored candy melts for the outer layer. Think vibrant orange, eerie green, or even a spooky purple! You can even swirl multiple colors together for a marbled effect before it sets.
- Ghoulish Googly Eyes: Once your fudge brains are unmolded and slightly softened, press a few edible googly eyes into the surface. It instantly makes them look more alive and extra creepy!
- Beyond the Brain: Don’t have a brain mold? No problem! Use other fun Halloween-themed silicone molds like ghosts, pumpkins, bats, or skulls. Or, simply pour the fudge into a lined pan and cut it into squares, then carve a little “gooey” center. For more dessert inspiration, check out these old-fashioned ice cream recipes.
- Nut Butter Swap: Feeling adventurous? While peanut butter is classic, try using almond butter or even sunflower seed butter for a different nutty flavor profile. Just ensure it’s creamy and smooth for the best texture in your Fudge Halloween creations.

Fudge Halloween: 1 Easy Brain Recipe
- Total Time: 2 hours 30 minutes
- Yield: 12 fudge brains 1x
- Diet: Vegetarian
Description
This Halloween fudge recipe creates spooky, brain-shaped chocolate peanut butter fudge with a gooey raspberry ‘blood’ center. It’s a perfect, creepy dessert for Halloween parties.
Ingredients
- 1 (14-ounce) can sweetened condensed milk
- 3 cups semi-sweet chocolate chips
- 1/2 cup creamy peanut butter
- 1/4 cup unsalted butter
- 1/4 teaspoon salt
- 1 teaspoon vanilla extract
- 1/3 cup seedless raspberry or strawberry jam
- Optional: red food coloring
- Optional: brain-shaped silicone mold
Instructions
- Lightly grease your brain mold or mini muffin tin and place it on a freezer-safe tray.
- In a saucepan over low heat, combine chocolate chips, peanut butter, condensed milk, and butter. Stir until smooth.
- Remove from heat and stir in salt and vanilla extract.
- Spoon the fudge mixture into each mold cavity, filling it halfway and pressing it up the sides.
- Place 1 teaspoon of jam into the center of each cavity. Add red food coloring if desired for a more dramatic effect.
- Top with more fudge mixture to completely cover the jam. Smooth the tops.
- Place the filled molds in the freezer for 2-3 hours, or until firm.
- Once firm, remove the fudge from the molds. Serve chilled or at room temperature for the full gooey effect.
Notes
- Use seedless jam for the smoothest, blood-like appearance.
- Work quickly as fudge thickens as it cools.
- Lightly grease molds for easier release.
- Ensure the fudge is completely frozen before unmolding for best results.
- For extra gore, drizzle red gel icing or extra jam over the top after unmolding.
- Prep Time: 15 minutes
- Cook Time: 5 minutes
- Category: Dessert
- Method: No-Bake / Freezer
- Cuisine: Halloween Treats
Nutrition
- Serving Size: 1 fudge brain

